الخميس، 30 أبريل 2015

iPhone Trick: Get your iPhone Charge Faster

Battery exhaustion is the big problem in smartphones. And when your iPhone goes down because of low battery, it feels sucking. Nevertheless, don’t worry I have found a solution for your problem. By applying this tricks you will be able to get your phone supercharge in short time.

Find more in this video and get your phone supercharged.


Read more for getting your iPhone charge faster.

Sense Glass Icon Pack HD for Nova-Apex-Next launchers etc

Hello everyone in the house... We come again to Andro9ja...

I'm sorry its been a while since I update you guys about what's up...

Today I bring you great customization for your android device.....

I bring to you GLASS ICON PACK...

Are you tired of the same old user interface all day..
Tired of that boring icons that looks old fashioned...
Lament no more... If you have a launcher installed on your device then great news for you...
You can use this app with any launcher of your choice...

More screenshots below...


Check out some of its features here...
-All icons changes.

- Icon masking/backing support for unthemed icons. 
- Matching Zooper Widgets

- Dashboard App

- Various alternatives to some icons. 

- Various misc icons for general use.

- Wallpaper picker with crop function in the dashboard application

- Support for Apex, Nova, ADW, Smart, Action, TSF (Basic Icon Support), Go (Basic Icon Support) and a few others.

Its paid from play store...


Free download links...


If you have any complain or request... Please feel free to comment below...

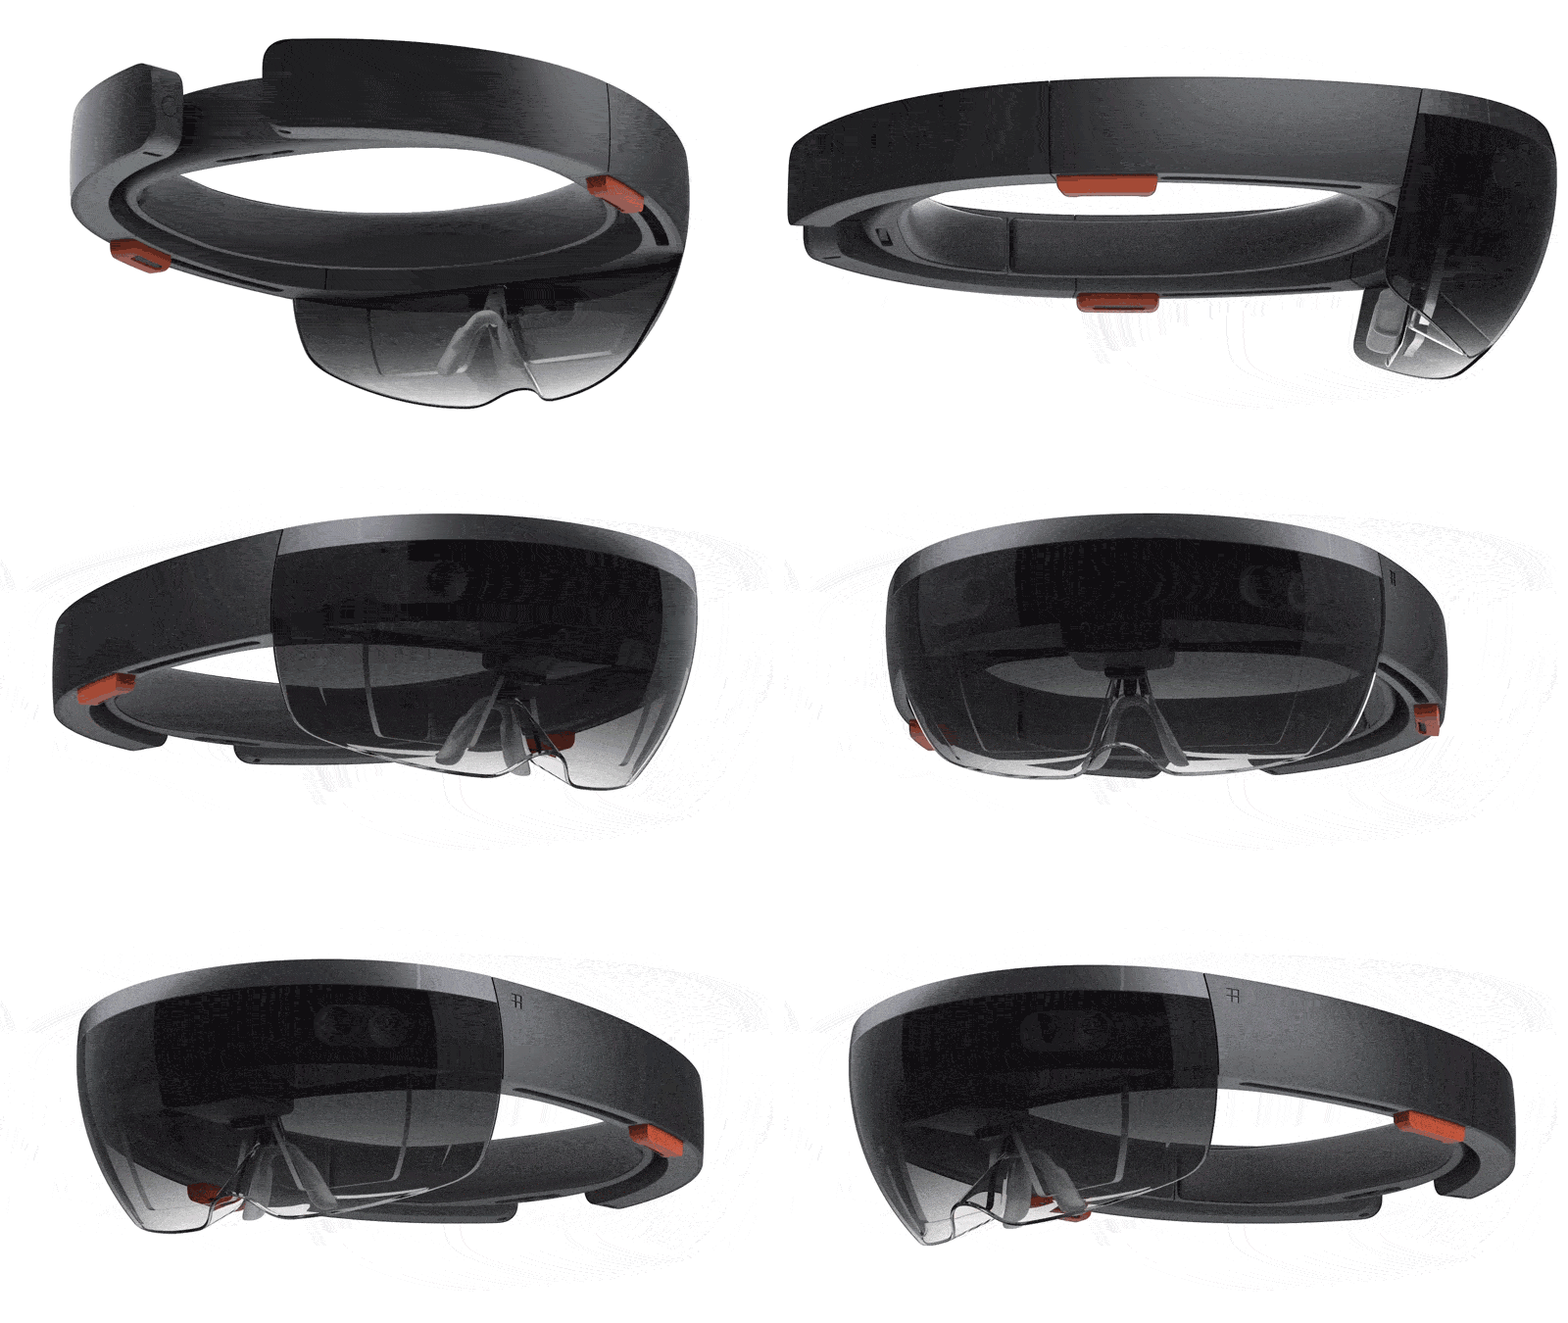
Microsoft offers a closer look at its HoloLens headset

Where are we heading to,is it the word we say as future,go more advanced to the future by reading this.
Microsoft has been showing off HoloLens at its Build developers conference this week on stage, with impressive demonstrations of some of its capabilities. While we’re aware of most of what HoloLens enables, the software maker has kept the details of its hardware headset rather secret. Today, Microsoft is offering up a few new details about what exactly is buried inside its futuristic headset.
Unlike most VR headsets, Microsoft is using see through lenses to allow you to see the rest of a room or the environment you’re interacting with, in a similar way to Google’s Glass headset. To assist with this, HoloLens uses a combination of spatial sound and sensors in the headset to capture information about the environment you’re in. Spatial sound works by using binaural audio, something we’ve looked at closely before, to make sounds appear like they’re being transmitted behind you or from anywhere in the environment you’re standing in. Just like Google Glass, there’s even a video camera so you can take photos or capture video.


Inside the headset Microsoft is using a variety of sensors. A microphone array captures voice commands, and Microsoft has built a depth sensor into the headset to spatially map the environment and understand hand gestures like the air tap feature to click and navigate. There’s an accelerometer, gyroscope, and magnetometer that all combine with head tracking cameras to process and understand how a head is moving. It all adds up to a headset that "weighs significantly less than the average laptop."


HoloLens also includes a CPU and GPU, just like you’d find in a laptop or PC. “But that wasn’t enough to handle all the processing required to understand our world, so we had to go beyond the traditional CPU and GPU,” explains Todd Holmdahl, head of Microsoft’s next generation devices team. Microsoft has created its own holographic processing unit (HPU) which acts as a third processor to process where you’re looking, hand gestures, and the spatial map around you in real-time. It’s a custom processor designed specifically for HoloLens.

While Microsoft is offering some new details about its HoloLens headset hardware, the company still isn’t providing detailed specifications or an explanation of exactly how HoloLens works without any wires or tethering to a phone. 

Copy in your Windows PC and paste it into your Android Phone.Amazing,then read me.

Hi iam going to share a wonderful peace of software which solves your problem while doing multiple tasks with your Android and Windows PC.So on the sudden you may arise with a question "How to share the clipboard contents from my Windows PC to Android Phone".Well iam here to solve your problem.


Steps to sync your clipboard contents to Android
It is not going to be a big task for you guys.It is simple.

  • Download ClipSync Server 3.0 (Uploaded onto my personal server).
  • Install the application you have downloaded and Run It and make sure your Android and PC were in the same network.Go and Click on the ClipSync icon like this and you will get an IP Address.
  • Now go and grab your Android phone.It seems it is the easiest step so iam not providing you any screenshots.Goto PlayStore and search for ClipSync then install it.
  • Now open the application and Press Options or Menu key and press New Server.Enter the IP Address you have got in the previous step and fill it in the first textbox carefully.
  • Now press "CONNECT AND SAVE",thats it if all goes well,then you will be greeted with a CONNECTED notification.
Conclusion
Even if it is a smarter application.This has some drawbacks like.It does'nt enable the power of cloud sharing only used inside a Local Area Network and also in the trail version,the copied text has some size limitations,that is only a partial amount of text will be copied.If you like it,then what are you waiting for go and purchase the PRO.

Don't hesitate to talk with me through the comment box.

[Battery Saving Tips] How to Monitor/Save/Extend Battery Life on my Samsung Galaxy S6 / S6 Edge

One of the first common issues that is plaguing owners of the new Samsung Galaxy S6 and Galaxy S6 Edge is on poor battery life or battery drains fast. And for this reason, we've come up with this post containing some tips that will help save or extend battery on the new S6 devices.

There are several factors that would affect battery power consumption on your device. Among these are network configuration, signal strength, enabled features, operating temperature, backlight settings, vibrate mode, frequency of calls and voice, data, browser use, wireless service provider and other apps' usage patterns. And proper management of these factors can help maximize battery life.

Here are some helpful tips that will help conserve battery power.

Monitor Battery Life on Galaxy S6/S6 Edge

Follow these steps to keep track of your phone's battery life or view the battery status:

1. Touch Apps from the Home screen.

2. Touch Settings.

3. Touch Battery.

Note: You may need to touch the System tab and then touch Battery to proceed.

4. You will be prompted with Battery status showing relevant details such as the percentage of battery power remaining and the approximate time for the power to last. The processes that have been utilizing the battery power on your device since it was last charged and the percentage used by each may also be shown.

Please note that the settings and screens available may differ by software version and wireless service provider.

5. To see which processes were running since the last time your device was fully charged, touch Battery Usage (if available).

6. To view its Use details or Adjust power use, touch the name of an application or process.

After viewing your phone's battery status, you will determine whether or not it is necessary to save power or reduce battery consumption.

How to Reduce Battery Consumption on your S6 or S6 Edge?

There are several options in your device that will help you conserve or save battery power. You can customize these options or turn off (disable) some features in the background so you can use the device longer between charges. Here are the things you can do to lower your phone's battery power usage.

1. Avoid or discontinue using Live wallpapers.
2. Disable/turn off Bluetooth feature when not in use or needed.
3. Disable/turn off Wi-Fi when not in use.
4. Disable/turn off GPS service when not in use.
5. Disable/turn off mobile data connection when not in use.
6. Disable/turn off auto-syncing of accounts if not necessary.
7. Disable/turn off Smart features if not needed.
8. Adjust/lower the backlight time in the timeout settings.
9. Adjust/lower the screen brightness or use Automatic brightness instead.
10. Disable/turn off haptic feedback.

Aside from turning off unnecessary phone features, proper charging of the battery can also help preserve battery life and the battery itself. Consider the following guidelines on how to properly and safely charge your battery:

1. Make sure you are using the Samsung USB/charging cable and wall charger. Do not use third-party accessories.

2. Make sure the USB/charging cable is securely connected. Remove anything that may possibly block the connection like a cover or case.

3. When the USB/charging cable is plugged in, verify if the battery or charging indicator shows on the device's display.

4. For best results, use a wall outlet when charging, instead of a computer.

5. Disconnect the phone from the USB/charging cable when the battery is fully charged.

More Tips to Save and Extend Battery Life on the Galaxy S6/S6 Edge

1. Turn ON Power Saving Mode

Enabling the Power Saving mode can also help reduce battery usage on your device. Here's how:

a. Touch Apps from the Home screen.
b. Touch Settings.
c. Touch Battery.
d. Touch Power saving mode to turn the feature ON.
e. Touch the Off slider to enable Power saving mode.
f. Touch power saving and select any from the given options.

With Power saving mode enabled, the maximum CPU performance will be limited, screen brightness and frame rate will be reduced, touch key light and Vibration feedback will be turned off, and the time before the screen is turned off when notifications are received will also be reduced, thus, saving battery power.

2. Turn ON Ultra Power Saving Mode

Aside from Power Saving Mode, your phone also features an Ultra Power Saving Mode which you can turn on to save battery power for your phone. With this mode, you can switch your phone's screen to a grayscale and turn off unnecessary apps for you to get the maximum battery life. Once enabled, you will be able to receive calls and text for up to 24 hours even if you're down to a 10% charge.

Here's how to enable Ultra Power Saving mode on the S6 / S6 Edge:

a. Touch Apps from the Home screen.
b. Touch Settings.
c. Touch Battery.
d. Touch Ultra Power saving mode.
e. Touch the OFF slider to turn the feature on.
f. If prompted, agree to the Ultra Power saving mode Terms and conditions and touch Agreeto proceed.

Important Notes:

Among the apps that are automatically available in Ultra Power Saving mode include the Phone, Messages, and Internet applications. You can make up to three or more apps available by touching the plus (+) icon.

You can also adjust network connections, display and sound settings in Ultra power saving mode by touching More and then go to Settings.

If you wish to turn off Ultra Power Saving Mode, just touch More from the Home screen and then touch the option to Turn Off Ultra Power Saving Mode.


Please stay tuned for more http://pinkberrylicious.blogspot.com /2015/05/generic-solutionsworkarounds-to-deal.html">generic troubleshootingmethods/workarounds to help save battery life for your Samsung Galaxy S6 and S6Edge smartphone in our next post.

How Moto X inspired these West Hollywood stylists


Spring is here and with the warm weather are endless ideas for cute looks. We’re a big believer in choosing your own style, which is why we give you the choice to customize your Moto X in a variety of different combinations, including genuine leather and wood backs. So we asked West Hollywood-based fashion experts at The Style List on Sunset Boulevard for their advice on creating a look that works.

They gave three tips:

Tip #1: Make a statement - A statement piece is a great way to define your look. It could be a skirt you love, a bold piece of jewelry—or even your phone!

Tip #2: Customize your style - It doesn’t matter what this season’s trends are—the most important thing is that you’re your own person! Make the style your own by choosing pieces and colors you love.

Tip #3: Be inspired - Look around you for inspiration to bring together your outfit or your style. Your statement piece could be a great place to start.

Want to see happens when you put these tips to work? The Style List uses customized Moto X’s as their statement pieces and put together three adorable outfits based on the phones:


Visit Moto Maker to create your own customized Moto X today.

The best way to write multiple IF statements into a single statement in Java,C++,Android-Java,etc

Hi everyone,

Today iam going to give you a wonderful trick a programmer facing off while dealing with IF statements.

Introduction
The most important phase of a program is its dynamicity.So without an IF ELSE statement,merely no programmer can write a program with dynamic content.So whats the big problem comes upon is the source file,its size is increasing according to the number of IFs are increasing.So why not just make multiple IFs to a single statement.And be a smarter programmer while others reviewing your source code.


How to write multiple IF statements into a single statement?
Here comes the saviour CONDITIONAL operator.

?: operator
The value of a variable often depends on whether a particular boolean expression is or is not true and on nothing else. For instance one common operation is setting the value of a variable to the maximum of two quantities. In Java you might write
if (a > b) { max = a;}else { max = b;}
Setting a single variable to one of two states based on a single condition is such a common use of if-else that a shortcut has been devised for it, the conditional operator, ?:. Using the conditional operator you can rewrite the above example in a single line like this:
max = (a > b) ? a : b;
(a > b) ? a : b; is an expression which returns one of two values, a or b. The condition, (a > b), is tested. If it is true the first value, a, is returned. If it is false, the second value, b, is returned. Whichever value is returned is dependent on the conditional test, a > b. The condition can be any expression which returns a boolean value.

Example

Unmodified Code
String mode="";
if(age<=10)
    mode="child";
else if(age>=11&&age<=19)
    mode="teenager";
else if(age>=20&&age<=45)
    mode="adult";
else if(age>=55&&age<=101)
    mode="old man";
else
    mode=null;
Modified Code with conditional operator
String mode=age<=10?"child":age>=11&&age<=19?"teenager":age>=20&&age<=45?"adult":age>=55&&age<=101?"old man":null

How easy it is?
11 lines of code into a single line code.Which is better?.Hm.Feel free to use the above trick anywhere in any language that support conditional operator and always be a smarter developer.

And don't forget to use the comment box :).

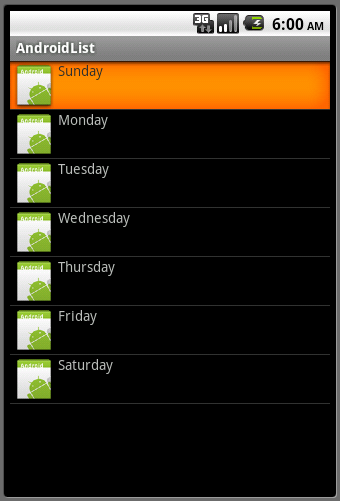
How to solve the ListView scrolling problem inside ScrollView as a parent in Android Java

Hi there,

Now iam going to give you a solution for "How to solve the ListView scrolling problem inside ScrollView as a parent in Android Java".

Introduction
Most of us we developers,facing problems while adding a ListView into a layout inside a ScrollView because of the screen size the items of the layout may overflow,so what we developers must want to use a ScrollView for solving that overflow problem.But there comes the problem what happense when we put a ListView as an item into the ScrollView.Due to multiple scrollable items in a single screen,the android os confused to handle the scroll event for which item the ListView or ScrollView,atlast it will give scroll event to ScrollView as it is the top most view considering the ListView.


How to get the touch event to ListView?
Don't feel overloaded it is simple to get all the things done.

  • Only one thing we want to do is just initialize a custom TouchListener for the ListView.
  • Initialize the ListView 

ListView itemsList=(ListView)findViewById(R.id.listItemsSale);

  •  Now simply add a TouchListener to the ListView.
itemsList.setOnTouchListener(new OnTouchListener() {
   // Setting on Touch Listener for handling the touch inside ScrollView
   @Override
   public boolean onTouch(View v, MotionEvent event) {
   // Disallow the touch request for parent scroll on touch of child view
   v.getParent().requestDisallowInterceptTouchEvent(true);
   return false;
   }
});

Conclusion
Feel free to use the above code anywhere you want.Any new ideas or helps feel free to use the comment box. 

Asus Zenfone 2 - The Superior Smartphone!

The latest gem from the world of Asus - the Zenfone 2, is a firecracker of a device! It has features that lift its position from a smartphone to that of a superphone! Take a look:-


ZenMotion or Magic?


The intuitive touch gesture of the Asus Zenfone 2 is so futuristic, it lets you draw an alphabet to open an app! So, the next time you wish to take a picture, just draw a 'C' and your camera will get to work! To add to it, the response time for all the touch and tap gestures is a fraction of a second - much faster than most other phones. This feature happens to be my favourite and hence, is right on top of this list!


Television-Like Child Controls 


If you have your little one playing with your phone every time she or he is around, you will thank Asus for for bringing the Kids Mode to the Zenfone 2. This mode lets you preselect the apps that your child can see and use. You can also block notifications and password-protect calls. The best thing is, this feature also acts like a strict parent and controls the time your kid spends using your phone. Another control is the secure browsing facility which is built into the default browser of the phone. This feature is powerd by Trend Micro.


PixelMaster Camera - The Ace Photographer


This phone is a God-send device for photo-fanatics! You can take the best low light and HDR pictures ever. It lets you merge 4 pixels into megapixel to capture more light in dimly lit environments. This phone comes with the big daddy of all HDR modes - the super-HDR mode! The picture quality on the Zenfone 2 is easily the best one seen across all phones so far. The low-light mode even works on the front camera. This means, you will have better selfies than your neighbours! ;-) Asus has also worked on its flash and given us the dual colour real tone flash, which removes that irritating white spot of light on most pics which are taken with the flash on. And if that DSLR is just too expensive for you, you can thank Zenfone 2 for coming with its own customizable settings for factors like shutter speed and ISO.

You can also do a lot of post processing with the PixelMaster. There is a Real-time Beautification mode for portraits and Photo Collage effect. You can also use the Super Resolution mode to take several smaller resolution pictures that combine to form a large photo. The Asus MiniMovie lets you collate your pics and form a nice video with a background music for better effects!

A Power Performer!


The Asus Zenfone 2 comes with a 4GB RAM which lets you keep 15 apps working in tandem without slowing your phone down. Also, the ZenUI which is build on top of the vanilla Android, is absolutely fantastic! It makes the process of operating a smartphone a dumb person's job! You will be impressed by the spectacular design and the form of the phone. Even the view-cover modes can be customised!

A Budget Buy!


After going through the huge list of amazing features, you might think the phone will cost you a bomb. But you will not believe your ears when I tell you it is available under $199! The offer is just too good to be true. So, make sure you prebook your own Asus Zenfone 2 which is available exclusively on Flipkart. Visit the Asus Flipkart Page and the Asus Facebook Page.

How to recover a pendrive showing a smaller size than the actual size like 16 gb showing as 2gb in Windows

Hi everyone,
Today iam with a trick to repair stating "How to recover a pendrive showing a smaller size than the actual size like 16 gb showing as 2gb in Windows".

Introduction
As many of the pendrives nowadays in the market was altered pendrives.That is,it will state the original brand(like Sandisk,Hp,etc) on the case and also stating a fake size of 16gb or 32gb.But actually the pendrive size may resemble like 4gb or 2gb.So please be careful before purchasing a pendrive.(Additional details included in Conclusion).


Steps to recover your pendrive


  • Now click on Quick Test button.
  • After Press OK twice for the consecutive message boxes.
  • After that a command prompt shown as below.

  • If all goes well then you will be greeted with a successfull message.
  • If you got the above message.Then start saying thanks for me.Because you got your pendrive back with full capacity.
  • Now press WIN+R combination and type in diskmgmt.msc and press Ok.
  • Now go select your pendrive from the list and Right Click and press Format and give it a name and press Ok.
  • THATS IT YOU GOT YOUR FULL FLEDGED PENDRIVE BACK.
Conclusion
Please verify your pendrive before purchasing it.
  1. Check the case of the pendrive for multiple company names.
  2. If it is a transparent cased pendrive,if you can see the IC note company name and the company name matched on the pendrive case.If differs,please go for another one.
  3. Ask the shop keeper for the guarantee of the pendrive.That is a day or two for checking with the mentioned software above.
  4. If you are purchasing from online stores.Please check the customer reviews or fulfilled label from the store.
Any help feel free to ask me.

Unlock Your iPhone 6 Plus Safely and Securely

If you wish to unlock your iPhone 6 Plus and ensure that it works equally well on other GSM carriers too, then opt for a safe and secure way to fulfill your desire. Needless to mention but your iPhone 6 plus is packed with some of the most exciting features and is Apple’s largest creation so far. However, no matter how good the device is, it will function with a specific carrier provider only and therefore, you will not be able to use your iPhone 6 Plus by inserting the SIM card of another GSM provider. This is precisely why you must seek the services of a professional and reputed unlocking service provider.
IMEI Unlocking – The Safest Way to Unlock
Websites that offer phone unlocking services, use the IMEI unlocking system to offer safe and secure unlocking. In order to unlock your iPhone 6 Plus, all you need to do is share your IMEI code with them and in turn they will check whether your IMEI code is available with their IMEI database or not. This search is performed for free of cost.
Unbelievable Customer Support
The moment you approach an unlocking service providing website, they will automatically proceed with your order and fulfill the same in record time. A phone unlocking website designs propriety unlocking system, which helps you unlock iPhone 6 Plus easily and securely. They also offer quick and efficient customer support in case you are facing problems with getting your phone unlocked. However, you should be aware that there are multiple scam websites on the internet which basically commit fraud in the name of offering unlocking services and disappear with your money. Therefore, always do a reference check and then proceed with the unlocking procedures further.
Unlocking Tips
Unlocking requires you to follow certain steps very carefully. First and foremost, make sure that your iPhone 6 Plus is fully activated with its original network provider before you eventually get it unlocked. Secondly, make sure that the device’s IMEI code isn’t barred, blacklisted, or stolen. Next, find whether its existing network is listed with the unlocking service provider or not. Once you have checked the above mentioned points, send your IMEI code to the unlocking service providing website and their representative will in turn send you a message confirming that your details have been received. Once you receive the message, you need to launch iTunes in your iPhone 6 Plus and you will automatically receive a message confirming that your phone has been successfully unlocked.
To sum up, if you are looking for an authentic and legal way of unlocking iPhone 6 Plus, then rely on IMEI method of phone unlocking.

How to connect my Samsung Galaxy S5 to my car using MirrorLink

Here's a quick guide for you to mirror your Galaxy S5's screen on your car's display using the MirrorLink system.

MirrorLink is a tool that provices integration between a car's infotainment system and a smartphone like the Galaxy S5 . It works in such a way that transforms smartphones into automative app platforms where applications are hosted and run on the phone while drivers and passengers interact with them through the dashboard buttons, steering wheel controls, and touch screens of the In-Vehicle Infotainment (IVI) system of the car.

If your vehicle has MirrorLink support, you will be able to view and interact with your mobile phone on your car's display. All you have to do is to connect your phone using a USB cable. Once connected, you can start controlling apps using your car's steering wheel and dashboard buttons.

Here's how to use MirrorLink to connect your Samsung Galaxy S5 to your car:

Important Note:

Make sure your car's stereo system supports MirrorLink so you can use this feature. If you are not sure if your car's infotainment system is compatible with MirrorLink, you can check out the MirrorLink website ahead.

Once you've verified your car's system has MirrorLink support, follow these steps to enable MirrorLink on your Galaxy S5 smartphone.

1. Connect your phone to your car's USB port using a USB cable.
2. Touch Apps from your S5 Home screen.
3. Touch Settings.
4. Touch MirrorLink.

Note: On some devices, MirrorLink settings can be found under More networks.

5. When prompted with the MirrorLink screen, mark the checkbox next to Connect to vehicle via USB.

Doing so enables the function to connect your phone to your car and begin to mirror your phone's screen on your car's display. Read and follow the given instructions to use your S5 while keeping your hands on the wheel.

Please note that screens and settings available may vary depending on the software version and your wireless service provider.

And that should do it.


Microsoft is going to bring iOS and Android Apps to Windows 10

Microsoft is trying to make it easy for Android and iOS mobile app developers to export their apps for windows 10 platform. So they have decided to make use of existing apps and their code, to enable Windows 10 OS user have it all in their mobiles.

Windows and Android

Earlier it was in rumors that Microsoft is experimenting to get other mobile OS apps to Windows 10. Now it is clear, Microsoft has revealed their planning and shown green flag in favor of these rumors. Microsoft is looking for emulators, that will allow developers to bring their existing code to Windows 10.

With this enhancement iOS and Android developers will be able to port their apps and games directly to windows universal apps. Microsoft said, they have two development kit for both iOS and Android platforms. For Android developers this kit will allow them to use Java and C++ programming languages to code on Windows 10 platform. And for iOS developers it will be allowed to use their existing Objective C code.

Windows over iOS and Android

During the interview with The Verge, Microsoft's Terry Myerson said,
"We want to enable developers to leverage their current code and current skills to start building those Windows applications in the Store, and to be able to extend those applications."
It looks simple, yet it is very complex when it comes create such a platform. But we already know nothing is impossible to do and these Microsoft guys believes in doing, surely they would have done something in their labs. We are just hoping to make use of this functionality in our phone, so, we can make use of all those amazing apps of other mobile OS.
Original Source: The Verge

الأربعاء، 29 أبريل 2015

Troubleshoot Samsung Galaxy Note 4 not turning on or not charging

This article contains the commonly recommended workarounds and possible solutions to a Samsung Galaxy Note 4 issue, in which the device won't power on or charge.

If you are having the same problem with your Note 4 device, I encourage you to spare a little of your time reading on, for who knows the fix you've been searching for is just indicated in this content.

Please don't forget to test your device after completing each of the following procedures to see if the problem is fixed. If not, then proceed to the next method until you hopefully get the remedy in the end.

If none of these workarounds would do any good to you, then you should consider other options available to resolve the problem.

1. Check if the battery is flat. Of course, you cannot turn on your phone if the battery is flat. If it is, then charge the battery.

To properly charge the battery, connect the charger to your phone. Wait until the battery charging icon is displayed as this indicates charging is in progress.

It may take a little longer for the battery charging icon to show especially if the device is completely drained. Allow it to charge for at least an hour or so. When the battery is completely charged, you can remove the charger from the wall socket and your phone.

2. Check for battery charging issues. Does your phone charge when you plug in the charger? If not, then it's likely the reason why your phone won't power on.

If your phone is not charging, here's what you can try:

a. Make sure you are using a Samsung-approved battery, battery charger, and USB charger cable for your device.

b. If you are using a wireless charger, make sure it has the Wireless Power Consortium logo and is Qi certified. Here are the things you can try when charging with a wireless charger:
  • Try to charge your device again.
  • Make sure the charging plate is plugged in.
  • Align the device on charging plate until both the phone and charging plate indicate it is charging. If it doesn't show it's charging, try to remove any possible obstructions.
  • Leave your device on the charger for at least one minute to make sure it is charging properly.
If the phone doesn't charge, then you may try using a different charger, (preferably 2.0Amp battery chargers) if available. Charging your device with a 1.0 Amp charger could take more time to fully charge.

3. Try to press the Power button for about 3 to 5 seconds. Doing so will help you determine if the battery is due to certain battery power issues that's why it does not power on.

4. Try to power on the device while it is connected to the wall charger. Also check if the device and charger display the correct charging/LED indicator. Again, please note that when the battery is extremely low, your display may remain blank for up to 5 minutes before a low battery image displays. In this case, the device usually powers up after 20 minutes of charging.

5. Make sure the SIM card is properly inserted. It's possible that your phone is not responding or showing a blank or frozen screen.

To eliminate the possibility that a SIM card issue is causing you this trouble, ensure the SIM Card is properly inserted and secured. You may consider removing and re-inserting the SIM card in this case.

The proper way to remove/re-insert SIM card on your Note 4 device is demonstrated below:

a. Make sure the device is completely turned off. Do not attempt the SIM card while your device is on because it could harm the SIM card or the device itself.

b. Locate the notch on the upper left edge of the back cover and then gently pull the battery cover off.

c. Locate the notch in the lower right corner of the battery and then pull the battery out gently.

d. When the battery is out, slide the SIM card out of the Micro SIM card slot.

You may insert the SIM card now or later. If you opt to re-insert it right away, be sure to have the gold contacts faced down and then insert the card notched end first into the Micro SIM card slot. Continue to the next step.

e. After securing the SIM card is positioned properly, align the battery contacts then press the battery into place.

f. Align the battery cover then gently press it into place.

Now try to power on your device. If problem persists, try the next workaround.

5. Try performing a soft reset, if applicable. This can be done by removing then re-inserting the battery after a few seconds.

If the issue remains after performing all the aforementioned workarounds, then you may consider either taking your device to a technician for possible faulty hardware repair or battery replacement.

Otherwise, please contact your phone carrier or Samsung Support to escalate the issue and ask for further assistance and recommendations.


How to create an animated video presentation

 Your texts are too long? Your slides are soporific? Your explanatory videos are has-been? Want to create an amazing and simple promotional video easily for your business?


 Powtoon is an online application to create free animated videos easily! Simply create an account and prepare an idea. The rest is almost alone (with your help, of course). The software provides libraries of images (in different graphic styles: drawings, illustrations, kids ..etc) and small character animations (happy, sad ..etc). There are also arrows, squares, text that is written with an animated hand or a hand that brings the objects! To all this, we can add music from the library or our own music, you can even put your own voice!

 Texts, images, animations (pre-designed) arrive and depart from one side to the other, all according to your chosen timing. It works much like Powerpoint (with slides), and as a video editor (with timeline).

 - Go to Powtoon and click ''Start Now'' then ''Sign Up'' for an account


 - Click "Create a new Powtoon"


 - Click "Blank"


 - Finally, you can create your animation!
 The following steps will explain the different tools you will need.


(1) Add or remove a page
(2) Play your Powtoon
(3) Save your Powtoon

Music:

 - Click "Sound" to add a music or your voice message. Click on "Image" to import an image from your computer.
 - Click "Add Text" to add your text.


 - You can import music or use software's music: "Add". Attention: "Upgrade" will ask to pay what you download.
 - Then press "Apply":


 (4) This will allow you to adjust the arrival of your text on your page
 (5) You can add or remove seconds on each of your pages.


Effects:


(6) Effects on the text
(7) Animated Characters or not
(8) Shapes and arrows
(9) Different styles of effects. Attention: some are payed (= more)!
(10) Frames of inserted images
(11) Several designs
(12) Transitions between pages
(13) Different Backgrounds: styles and colors

 - After you finish your video, Save it then you can share it with your friends (eg. on Facebook):


 - You can also use the Embed Code to inser your Powtoon directly on your Blog:


 Important tricks to do it well:
 - Respect the inverted pyramid: the most important at the beginning of your video and at the details in the end.
 - Choose a message: No more than one message per video. The goal is to clearly, explain an idea or point of view.
 - Meet your target: your message must respond to a need or a request or offer a proprietary.
 - Prepare your animation on a paper: Create a scenario, mini storyboard and list the content you need.

 Share your presentation videos with us on comments :)

Best Free Sources to Search and Download Drivers for your Computer

 You probably agree with me that the first thing you do after a PC formate is to look for the appropriate Drivers for your computer components, even though the manufacturers websites provide you with those drivers according to your computer model, but in some cases, you may not find what you are searching for or that the site does not provide the last update of the Driver. Therefore, the solution is to look at other sites. So as to shorten the time for you, i offer here a list of the most important sites to download Drivers for free.

Best Free Sources to Search and Download Drivers for your Computer

 Where to find and download your computer drivers for free?


http://www.driverguide.com/
 One of the most powerful websites in this domain, it gives you access for download of thousands drivers from various manufacturers of computers in the world.


http://www.techspot.com/drivers/
 Another greate site, you can use it to search for any driver you want, it gives a huge library of drivers downloadable for free!


http://driversbay.com/

 Source of an important variety of drivers to download for all computer components, the most beautiful in the site that it also supports Mac and Linux, as well as showing you which system is compatible with a such driver to make your life easier.


http://www.soft32.com/windows/drivers/

 This site does not only specialized in Drivers, but also in programs and applications of mobile phones. It allows you to find and download drivers that you are looking for just by few simple steps.


http://driverzone.com/
 With this site you can access to more than 3,100 GB of the updated drivers for various devices. Not only that, the site also lets you download a special program to examine the drivers missing in your computer and updates them directly from your computer without having to search for!


http://www.driverskit.com/
 This site is not only a search engine for drivers, it also lets you search for DLL files that may be incomplete in your Windows operating system, you can of course check by component like Video or audio cards or by its search engine.

 If you like the post please share it with your friends :)

Is Android really better than iOS?

Today in Open Source: Is Android better than iOS? Plus: How to run Linux on your Windows computer, and a Pennsylvania school district embraces open source solutions


Paul Stamatiou has switched from iOS to Android, and he has a compelling list of reasons why he thinks Android is better than iOS.

It was just meant to be a quick experiment. I started using a Nexus 4. I was going to go right back to my iPhone after a week. I was designing more and more Android interfaces at Twitter and realized I needed to more intimately grok Android UI paradigms.

A week in it started feeling normal; the larger form factor was no longer a nuisance. A month in I didn't miss anything about my iPhone. Two months in I sold my iPhone 5 and iPad Mini. It has now been three months since I made the switch. I'm loving Android.

More at PaulStamatiou.com

I generally hesitate to wade into the "this product is better than that" kind of discussion, for the simple reason that everybody's needs are different. If you read Paul's commentary (and it's worth a read), it's clear that Android is meeting his needs much more than iOS ever did.

Angry iOS and Android Fans
I'm sure Paul is going to catch some heat for his commentary from some of the Apple devotees out there. What he is saying amounts to heresy to some of those folks, but I give him credit for honestly stating his preference in mobile devices.

I think he'd be catching heat if he'd written it the other way around, and had switched from Android to iOS. Some Android fans are as equally passionate as their iOS counterparts for sure.

Beauty is in the Eye of the Beholder
But beauty is in the eye of the beholder when it comes to mobile devices and ecosystems. My friend Kevin used to use an Android phone, but switched to IOS and he's never been happier. I've asked him why and his answer amounted to "it just works" and he's happy with that.

I have yet another friend though who switched from iOS to Android because he has large hands and needed a larger size screen on his phone. Patrick is able to shift easily between operating systems, and may yet move back to iOS if Apple ever releases an iPhone with a larger screen.

Choice is a Beautiful Thing: Android, iOS or Something Else
If the product you choose isn't meeting your needs, then it makes sense to switch as Kevin, Patrick and Paul did. That is why competition and market alternatives are so important. No two users are exactly alike, and no product is going to make everybody happy.

Choice is a beautiful thing, whether you choose iOS or Android or something else entirely.

Have you switched between iOS and Android? Or did you choose something else? Tell me why in the comments.

How to Run Linux on a Windows PC
SJVN had a great article yesterday here on ITworld about how to run Linux on a Windows PC. It's a guide that will help get you started with Linux.

How to Clear Browser Cache/Wipe Cache Partition on my Samsung Galaxy S6

This content will walk you through clearing browser cache on your Samsung Galaxy S6 smartphone. Clearing the browser cache will help you get a better and faster browsing experience on your mobile phone.

Follow these steps to clear cache on the Galaxy S6 Internet browser:

1. Tap Internet from the Home screen.

2. Tap More to view more options from the browser screen.

3. Scroll to and tap to select Settings from the given available options.

4. Under Internet settings, scroll to and tap to select Privacy.

5. Proceed by tapping Delete personal data option from the Privacy menu options.

6. When prompted with the Delete personal data screen, tap to check Cache from the list.

7. Tap Delete to remove all cached information from the browser.

8. Wait until the cache is completely cleared.

Clearing of cache duration may vary depending on the amount of information stored in your browser.

Cache basically refers to temporary folders that contain temporary files in your computer. It's like a dumping ground for temporary data. While caches could make your phone faster, they too can get bogged down in time. That said, you are required to clear cache from regularly.

There are different kinds of cache to wipe or clear. And to be more specific, we will focus on clearing cache from the Galaxy S6 browser app.

A quicker way to clear apps cache on the Galaxy S6 is through the Settings menu. Here's how:

1. Go to Settings.
2. Select App Manager.
3. Find the app of which you want to clear the cache.

Tip: You can find apps from the Downloaded section, Running or All tab. 

4. Tap the entry.
5. Tap Clear Cache.

Tip: To clear all app caches simultaneously, go to Settings -> Storage, and then tap Cached Data -> OK.

Wipe System Cache (Wipe Cache Partition) on Samsung Galaxy S6

In case you notice something's wrong with your Android system or it's acting weird, then you may need to consider clearing the system cache itself. This method is also referred to as wiping the cache partition. It's often useful when done straight after performing an Android update, when the battery drains, as well as when glitches or apps crashes occur on your device.

Here's how to wipe cache partition on your Galaxy S6:

1. Power off your phone.

2. Press and hold the Power, Volume Up and Home button.

3. When you see a blue screen with Android logo on it, you will be routed to the recovery menu.

4. To scroll and highlight Wipe Cache Partition, use the Volume buttons. 

5. Press the Power button to confirm selection.

6. A message in yellow will then appear at the bottom of the screen. This should serve as your signal that the wipe cache partition process is completed.

7. Highlight the option to Reboot System Now.

8. Press the Power button to confirm selection.

9. Wait for your Galaxy S6 to reboot and recompile all of your applications. It may take a while for your device to re-cache them all so just wait patiently. Once the process is all done, you should have your S6 running as smooth as it should.

Hope this helps.